
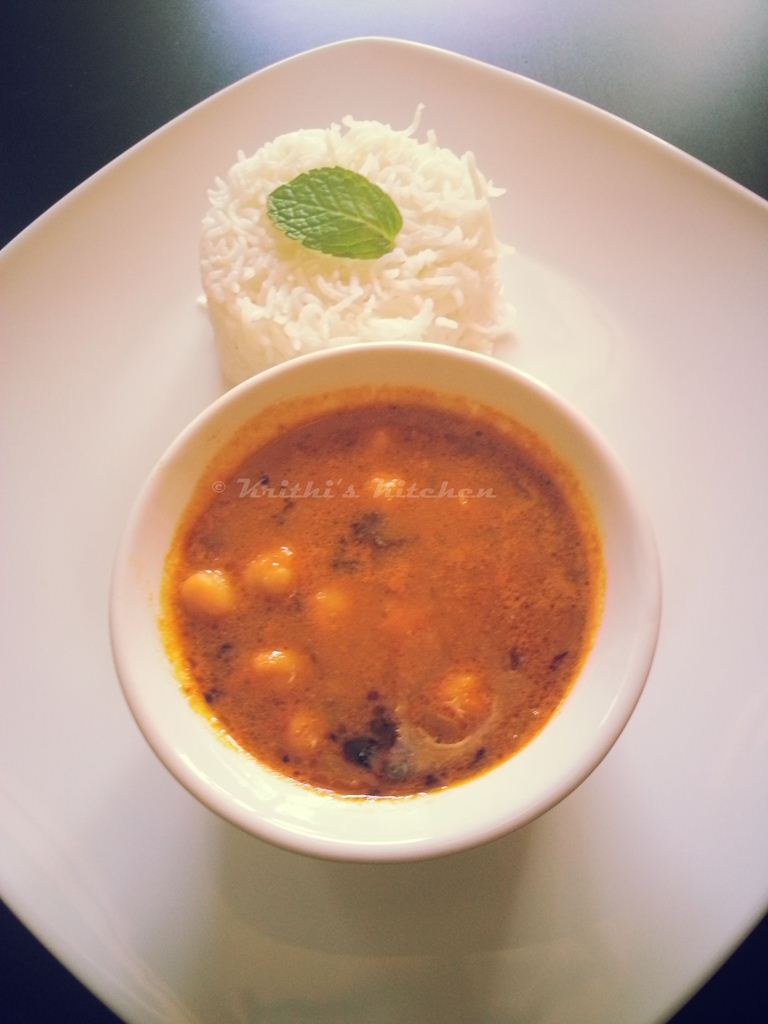
Sundal / Dried chickpeas (garbanzo) - 2/3 cup - soaked overnight and cooked OR use 1 can of garbanzo beans - Click here to see how it is done
Tamarind - size of a lemon
Onion - chopped - 1 cup
Garlic - 3 cloves - halved
Olive oil / Canola oil - 2 tsp
Gingelly Oil - 1 tsp
Thalippu Vadagam/Badaga - 1/2 tsp
Salt - to taste
Make a paste:
Grated Coconut - 2 tbsp (heaped)
Coriander powder - 2 tsp (heaped)
Chilli powder - 1/2 tsp (Use 1 tsp if using Kashmiri chiili powder)
Turmeric powder - 1/4 tsp
Soak dried chickpeas in plenty of water overnight. Drain the water and pressure cook for 3 whistles adding three times water and 1/2 tsp of salt. Drain and set aside. If using canned beans, drain and wash the beans to remove extra salt. Soak the tamarind in warm water and extract 2 cups of juice. Grind the ingredients under make a paste into a smooth paste, adding water as required.
In a kadai, heat oil and saute the onions and garlic until the onion turns soft. Add the cooked beans and saute for a couple of minutes. Add the tamarind juice, ground paste, salt and 1 cup of water. Check for salt and spice and allow it to boil in med-high heat. When it comes to a rolling boil, reduce the heat to simmer and allow it to cook for another 45 minutes uncovered. Yes, you read it right. The kulambu has to cook for 45 minutes for the flavors to meld and to be "finger-licking-good". But stir it once every 10 minutes to make sure the coconut doesn't stick to the bottom. After 45 minutes heat gingelly oil (kind of a mandatory item here) in a small pan and splutter the vadagam. Pour over the Kuzhambu and serve hot with rice. Enjoy!
Note:
1. The sundal can be replaced by black eyed peas, white navy beans, mochai etc.,.
2. Do not try to reduce the simmering time by increasing the heat and reducing cooking time. It is quite not of the same taste. Trust me!


Kuzhambu looks delicious! How is lil Kavin doing? :)
ReplyDeleteKavin is doing good Mahi.. Thanks for asking..
DeleteMy mom's signature dish, truly missing this kuzhambu..Have to make some soon.Hugs to lil darling.
ReplyDeletei used to add few brinjals along with channa...one of my fav...looks very inviting!
ReplyDeletei love channa in any form, curry looks so good
ReplyDeletelooks so tempting...
ReplyDeleteVery inviting kuzhambu...looks very creamy and delicious...
ReplyDeletelove the kuzhambu
ReplyDeleteyummy and all time fav:)
ReplyDeleteyummy and inviting recipe.. .
ReplyDeleteOngoing event:
Know your dairy - Milk Events
in my blog
delicious kuzhambu.. looks inviting...
ReplyDeleteSpill the Spices
Lipsmacking curry krithi
ReplyDeleteWow that is so tongue tickling... so delicious!!!
ReplyDeleteSowmya
Ongoing Event - Breakfast
Ongoing Event - Tried and Tasted - Raks Kitchen
Enakku romba piditha kuzhambu.Romba nalla irukku.Papa eppadi irukkan? Anbu muthangal avanukku.
ReplyDeletevery healthy n so tempting
ReplyDeleteBookmarking this & definitely gonna try this..!!! Too delicious & mouthwatering!!
ReplyDeletePrathima Rao
Prats Corner
It is been long time since i visited your place. Hope you are doing good. Thanks for visiting my place too. :-) I like your sundal kulambu. we prepare this in the same way but adds brinjal to it.
ReplyDeleteI followed your method of preparation..kulambu tasted very yummy !! the only difference I made was that I added some curry leaves and coriander leaves...thanks to you for sharing this..very helpful
ReplyDeleteThanks for the feedback.. Glad you liked it..
DeleteTried the recipe last night. Wow the 45 mins slow cooking really enhanced the flavor. Thanks!
ReplyDeleteThanks for the feedback Jaideep. Glad you liked it..
DeleteI love my mom receipe very much
ReplyDeleteI tried your recipe. Though I'm a beginner, it came out very well. So delicious. Thank you for this detailed version.
ReplyDelete